Your bathroom is more than just a functional space—it’s where mornings begin and days unwind. We’ve all stood in that room, staring at outdated tiles or cramped layouts, wondering how to make it feel like ours. Maybe you’ve hesitated to start because the process seems too complex, too expensive, or too time-consuming. Sound familiar?
Let’s simplify this journey together. A well-planned renovation doesn’t just refresh your space—it transforms how you live. We’ll help you sidestep common pitfalls, like mismatched fixtures or poor lighting choices, so every decision adds value to your home.
Think about what matters most: storage that works harder, surfaces that last longer, and designs that spark joy. Whether you’re dreaming of spa-like serenity or sleek modern efficiency, bathroom remodel tips can create big impact. And yes—you can achieve this without blowing your budget.
Key Takeaways
- Strategic planning prevents costly errors during renovations
- Balancing aesthetics and functionality boosts daily comfort
- Smart material choices enhance durability and style
- Lighting solutions dramatically alter space perception
- Budget-friendly upgrades can deliver luxury feels
Understanding the Basics of Bathroom Remodeling
Renovating a space requires more than picking pretty tiles. It’s about creating lasting value through smart decisions. We’ve helped countless homeowners transform their rooms into efficient, beautiful retreats while dodging expensive missteps.
Why Thoughtful Renovations Matter
Updating your space does double duty. It boosts your home’s resale potential while making daily routines smoother. Research shows mid-range renovations can yield 60-70% ROI when done right.
“Nothing is more expensive than doing things twice.”
Steering Clear of Costly Errors
Rushing the planning phase tops the list of mistakes. Here’s what often goes wrong:
- Underestimating timeline by 30-50%
- Choosing trendy materials that date quickly
- DIY-ing plumbing/electrical without permits
| Planning Phase | Time Needed | Outcome Impact |
|---|---|---|
| Initial Design | 2-4 weeks | Prevents layout changes mid-project |
| Contractor Bids | 1-3 weeks | Ensures fair pricing & quality work |
| Material Sourcing | 3-6 weeks | Avoids installation delays |
We recommend working with licensed professionals early. Their expertise helps spot potential issues before demolition begins. Remember: good planning today means fewer surprises tomorrow.
Expert Bathroom Remodel Tips: Proven Strategies for Success
The key to a stress-free project lies in two critical factors: plumbing preservation and craftsmanship. Let’s explore how these elements work together to create lasting value.
Keeping Major Plumbing in Place
Relocating pipes often becomes the hidden cost that derails budgets. Moving a toilet just 3 feet can require new drain lines—adding $2,500+ to your project. As designer Marty Petrie notes: “Preserving your current layout lets you splurge on visible upgrades instead of buried pipes.”
| Labor Option | Average Cost | Project Longevity |
|---|---|---|
| General Handyman | $45/hr | 2-5 years |
| Specialized Contractor | $85/hr | 10+ years |
| Design-Build Firm | $120/hr | 15+ years |
Investing in Skilled Labor
We’ve seen $10 tiles look luxurious when installed by pros—and $50 tiles ruined by rushed work. Elizabeth Goltz puts it bluntly: “Quality installation beats expensive materials every time.”
When meeting contractors, ask for:
- Photos of completed projects
- References from past clients
- Warranty details on their work
Make sure to compare at least three bids. The lowest price often means cutting corners, while mid-range offers usually deliver the best balance of skill and value.
Planning Your Remodel: Time, Budget, and Design Essentials
Creating your dream space starts with a solid roadmap. We begin every project by mapping out what stays, what changes, and how each decision impacts your daily routine. This upfront work saves headaches later—like discovering your favorite vanity won’t fit after demo day.
Setting a Realistic Timeline
Time management makes or breaks renovations. Older homes often reveal surprises—like corroded pipes or faulty wiring—that add 1-2 weeks to schedules. We build buffers into every phase:
| Phase | Typical Duration | Buffer Days |
|---|---|---|
| Design & Permits | 2-4 weeks | 3-5 days |
| Material Delivery | 3-6 weeks | 7 days |
| Construction | 4-8 weeks | 10 days |
Rushing tradespeople often leads to sloppy tile work or leaky seals. As one contractor told us: “Good speed comes from experience, not haste.”
Establishing Your Budget
Your budget should reflect both dreams and realities. We recommend:
- 50% for labor
- 30% for materials
- 20% contingency fund
That 10-15% cushion handles surprises without derailing plans. Found extra cash post-project? Splurge on plush towels or invest in your next upgrade. Smart planning today means fewer financial shocks tomorrow.
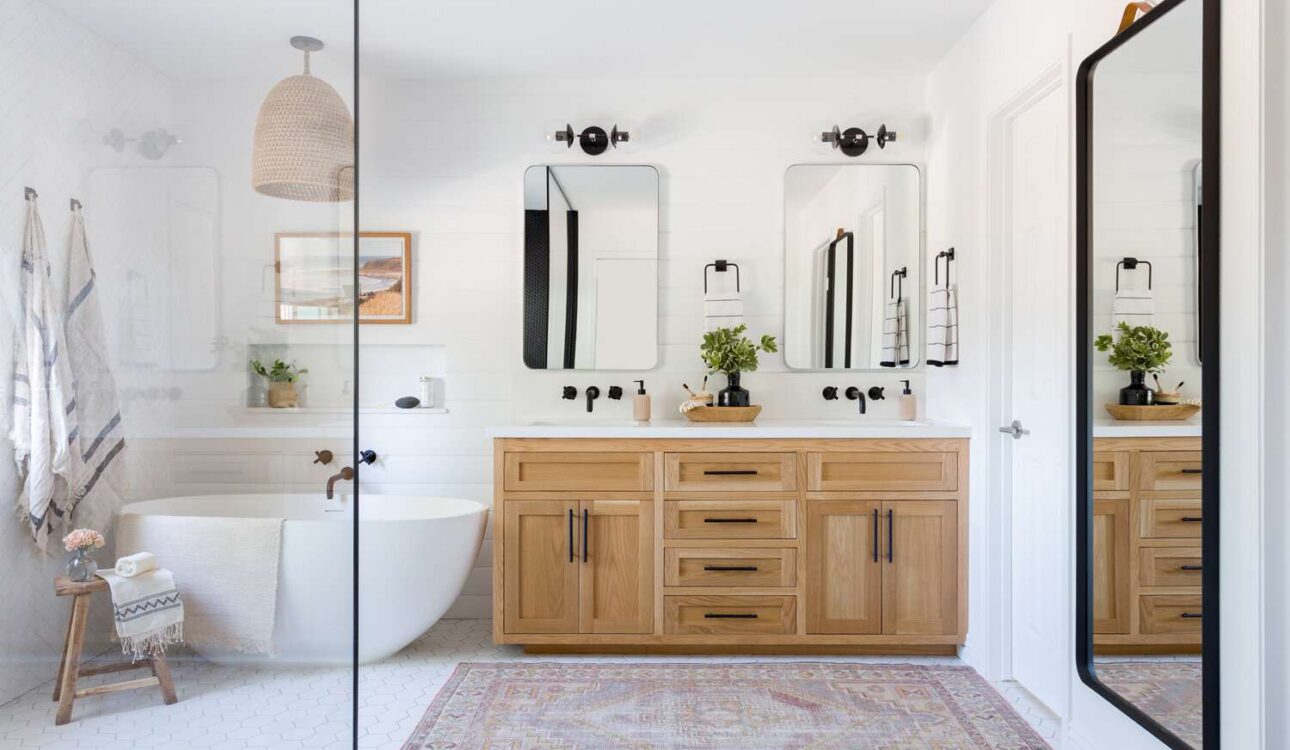
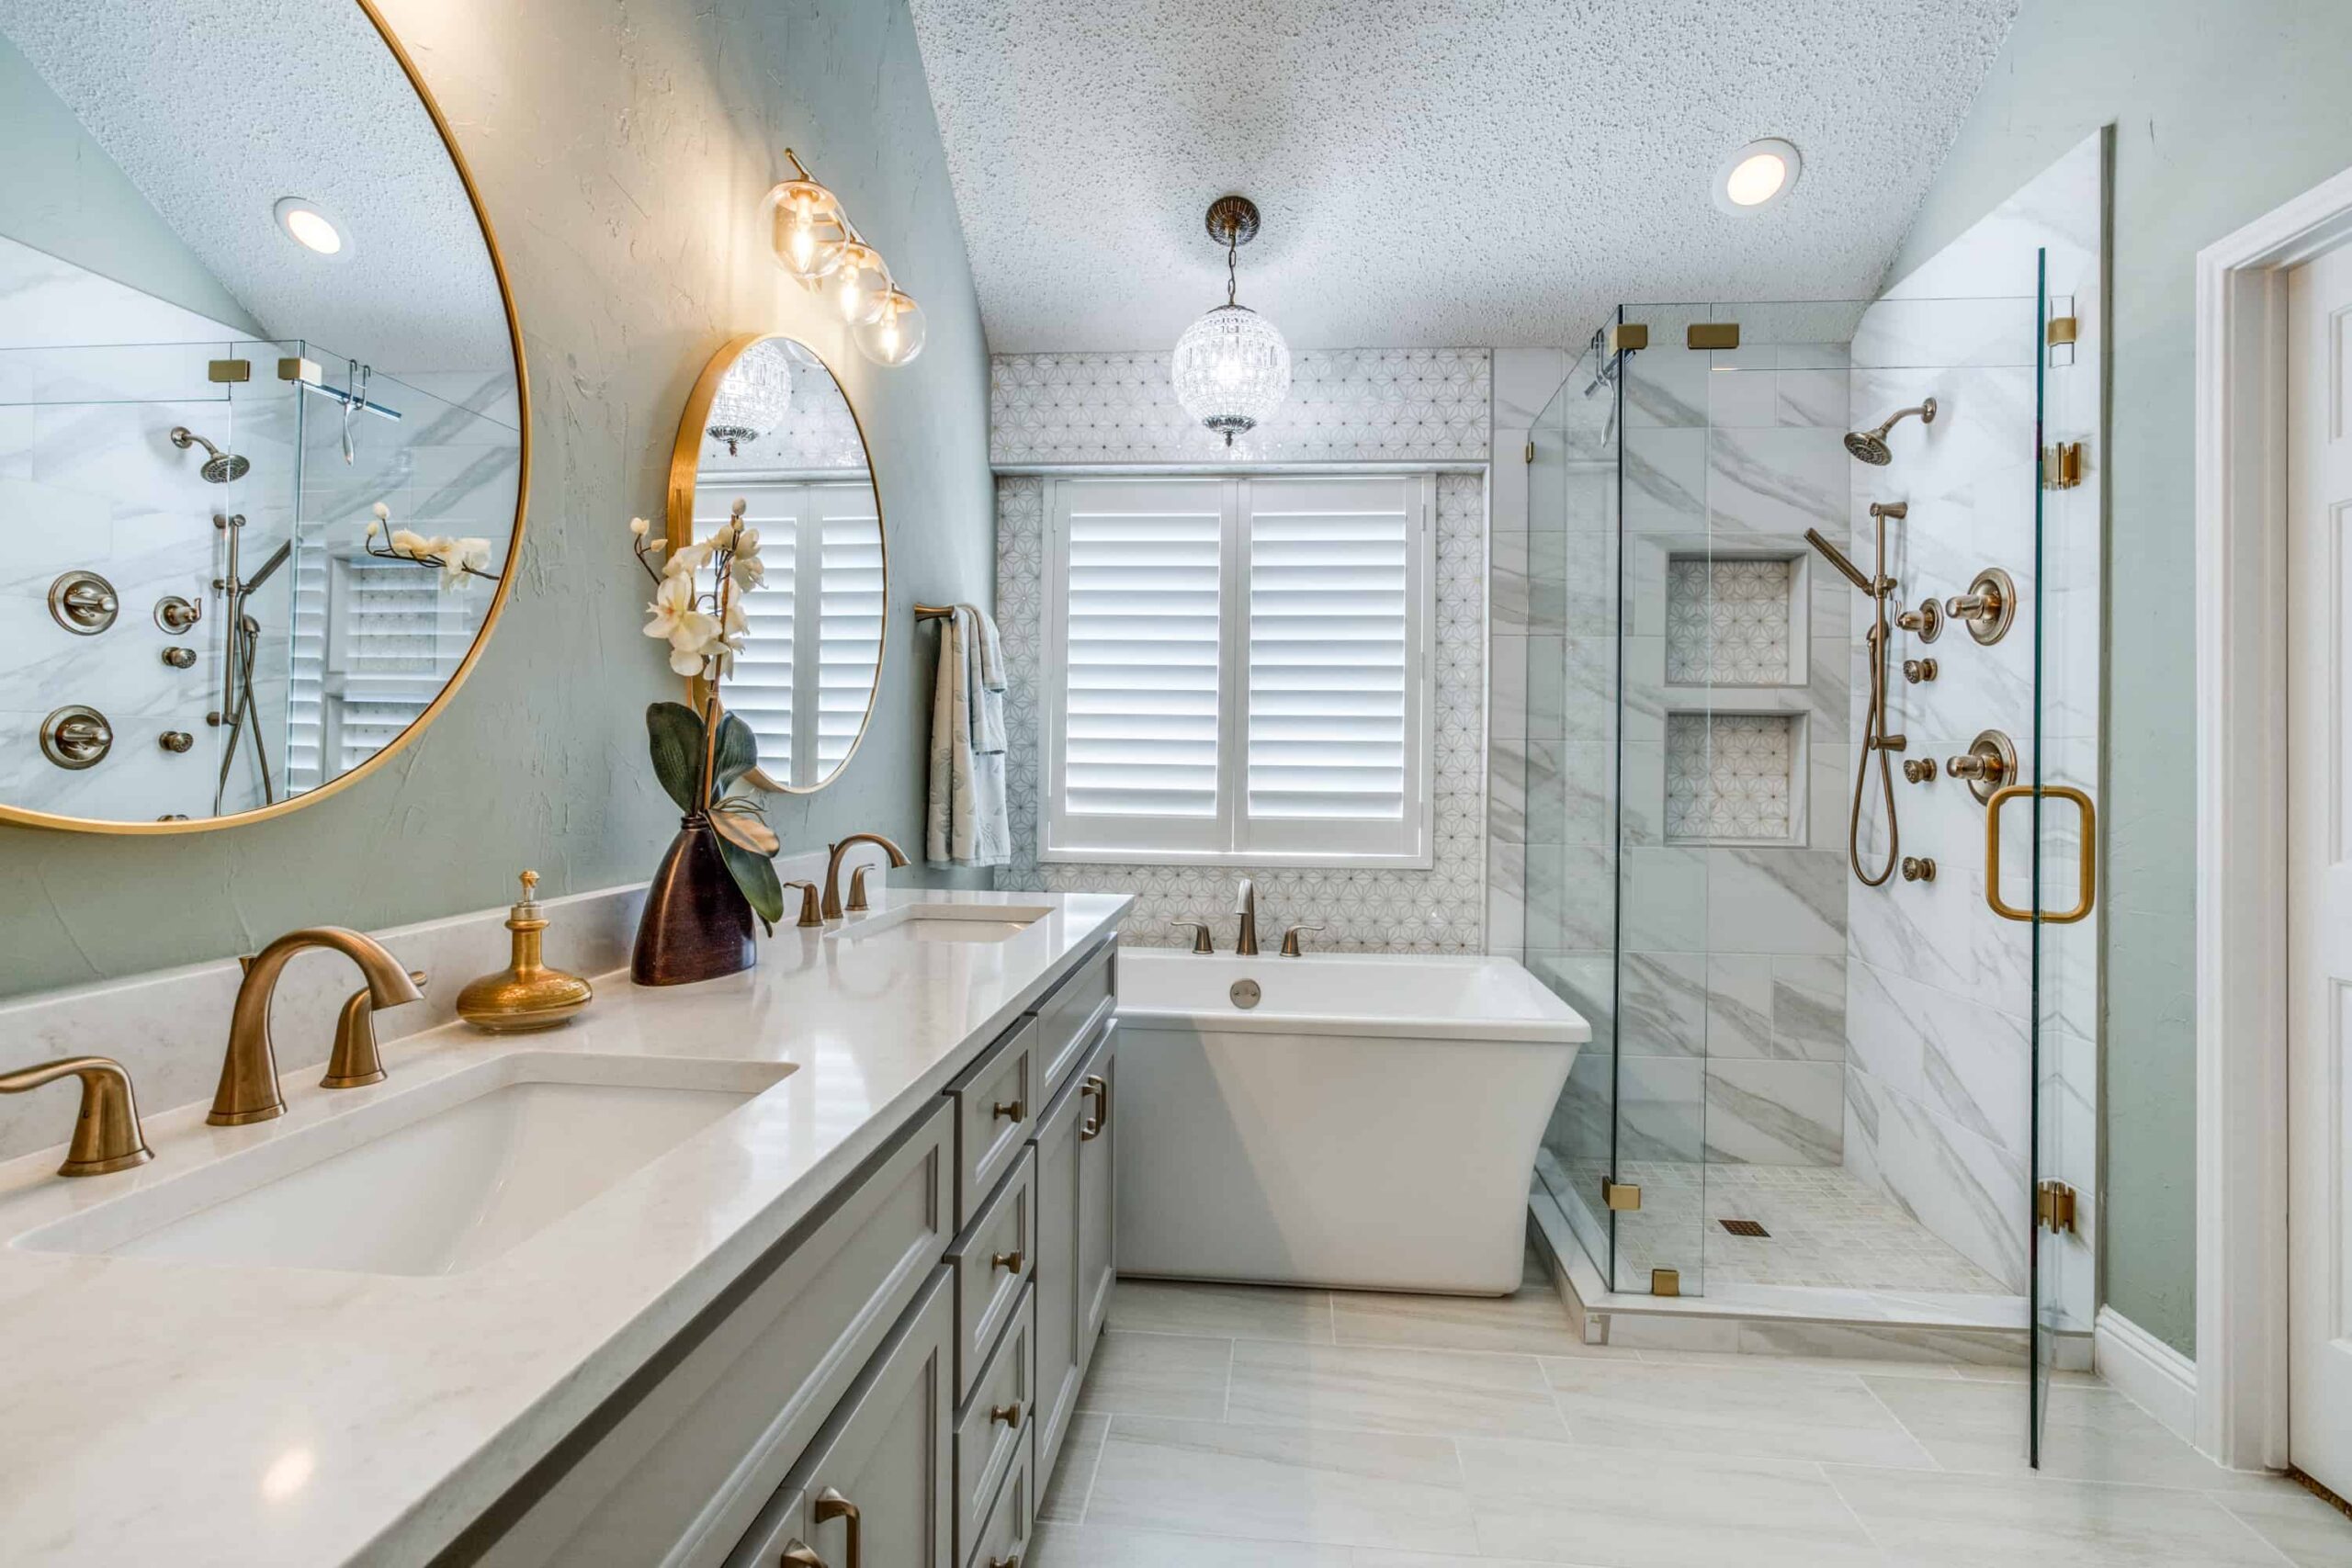
Designing Your Ideal Bathroom Space
Transforming your private retreat begins with intentional choices that balance personality and practicality. We focus on three pillars: smart layout, visual harmony, and materials that age gracefully.
Selecting a Color Scheme and Style
Color sets the emotional tone of your sanctuary. While crisp white remains a timeless foundation, we’re seeing bold moves:
- Moody navy accents create depth in compact areas
- Sage green backsplashes bring organic warmth
- Sunny yellow towels inject cheerful energy
“Your palette should work at dawn and dusk,” notes interior designer Mara Santos. Test swatches under both natural and artificial light before committing.
Choosing Fixtures and Finishes
Hardware is the jewelry of your design. Keep plumbing locations fixed to avoid costly reroutes, and let finishes tell your story:
| Finish Type | Visual Impact | Maintenance |
|---|---|---|
| Brushed Gold | Warm luxury | Fingerprint-resistant |
| Matte Black | Modern edge | Shows water spots |
| Polished Nickel | Timeless shine | Daily wiping needed |
We guide clients toward cohesive combinations – like pairing oil-rubbed bronze faucets with walnut vanities. The right mix elevates everyday routines into sensory experiences.
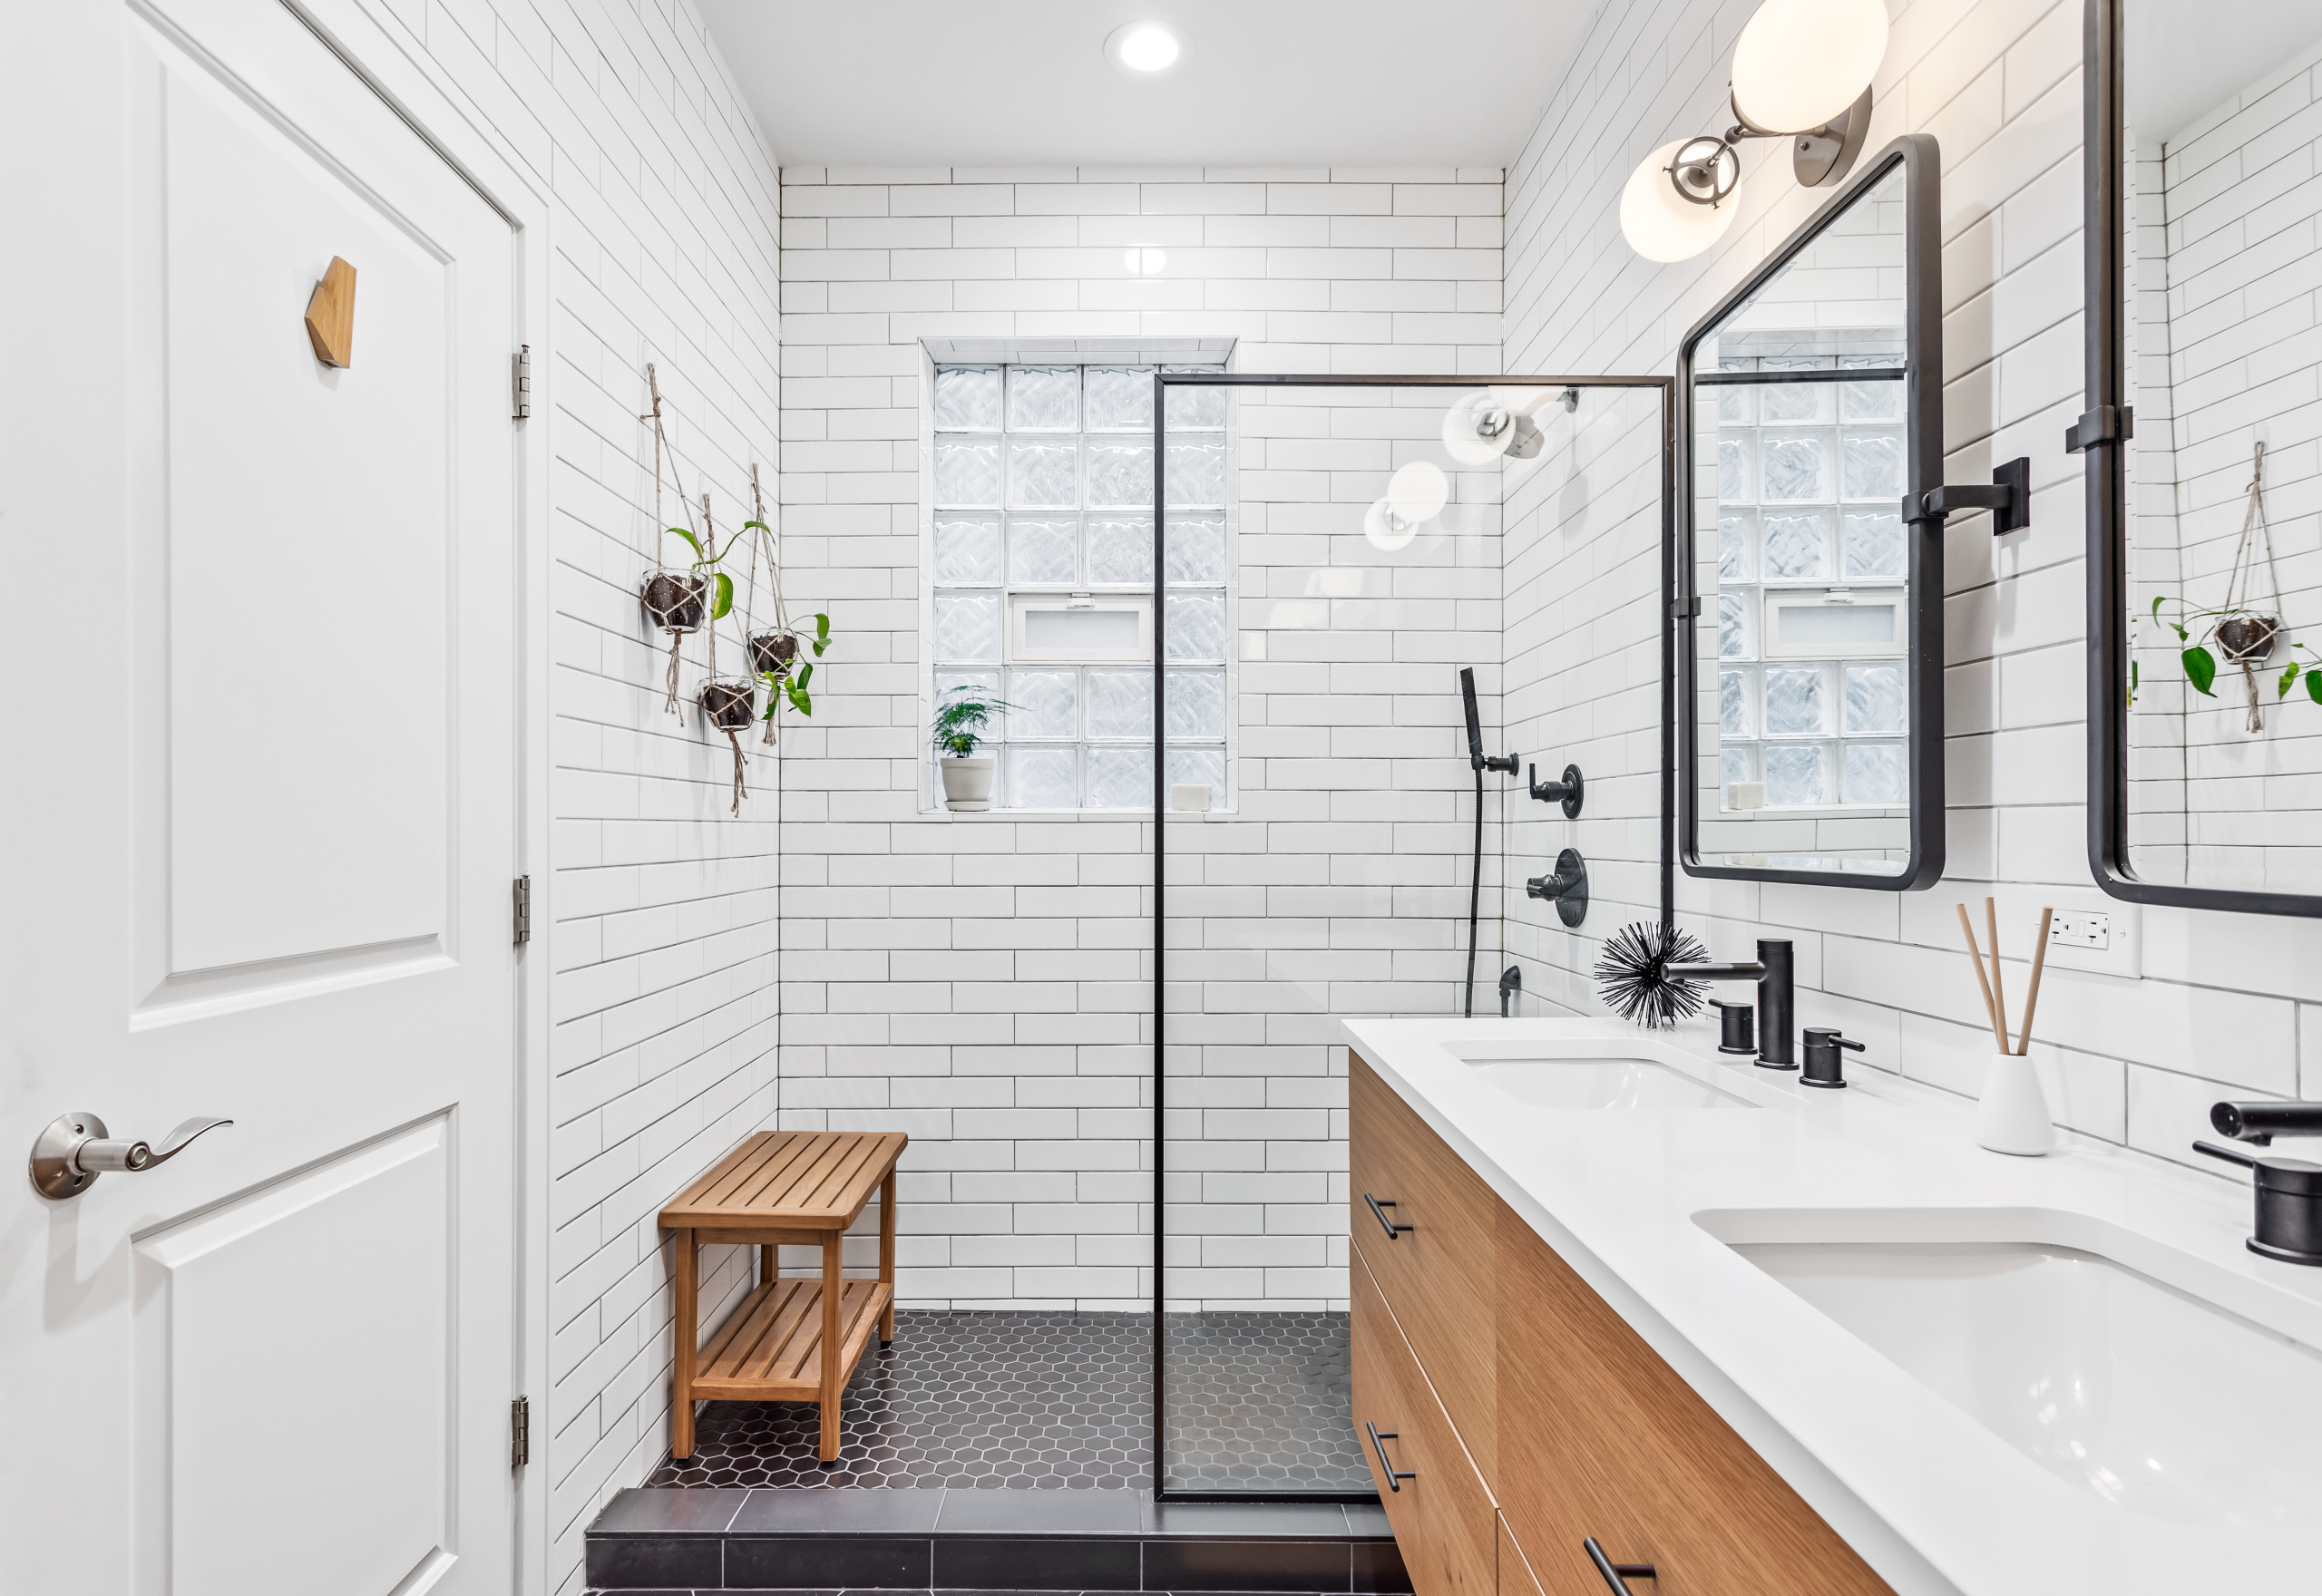
Navigating Key Materials: Tiles, Vanities, and More

Your material choices form the foundation of both style and practicality. We prioritize options that blend durability with design flexibility, ensuring your space stays beautiful through years of daily use.
Choosing Quality Tiles and Countertops
Porcelain remains our go-to for high-traffic areas. At $5-$15 per square foot, it outperforms cheaper alternatives that often have uneven edges. These imperfections lead to wavy grout lines – a telltale sign of rushed installations.
- Moisture resistance: Porcelain absorbs 0.5% water vs. ceramic’s 3-7%
- Design versatility: Wood-look planks or marble patterns without maintenance hassles
- Longevity: Properly installed tiles last 20+ years
Pair your tile with countertops that share similar care requirements. Quartz works beautifully with porcelain, offering scratch resistance and consistent coloring.
Finding the Right Fixtures for Your Needs
Fixtures should marry form and function. We match faucet finishes to your vanity hardware while ensuring proper water flow rates. Consider these popular combinations:
| Vanity Material | Ideal Fixture Finish | Flow Rate (GPM) |
|---|---|---|
| Walnut | Oil-rubbed bronze | 1.5-1.8 |
| White Lacquer | Polished chrome | 1.2-1.5 |
| Concrete | Matte black | 1.8-2.2 |
Always test handles and knobs for comfort – what looks sleek in photos might feel awkward during morning routines. We source samples so you can experience textures before committing.
Comprehensive Guide to Waterproofing and Ventilation
Moisture management separates temporary fixes from lasting renovations. While many focus on surface-level solutions, true protection starts behind walls and under floors. We prioritize systems that combat water intrusion at its source.
Waterproofing Techniques That Work
Standard drywall can’t handle steam and splashes. Our approach uses layered defenses:
- Vapor barriers beneath tile installations
- Moisture-resistant cement boards instead of greenboard
- Sloped shower pans with sealed seams
Musty odors often signal hidden mold growth. While not toxic, these spores trigger respiratory issues. “We’ve resolved 83% of air quality complaints through improved ventilation,” notes environmental specialist Mark Tilden.
| Traditional Methods | Advanced Solutions |
|---|---|
| Basic exhaust fans | Humidity-sensing ventilation |
| Plastic sheeting | Liquid-applied membranes |
| Caulk repairs | Epoxy injections |
Older homes frequently lack proper airflow. We install quiet, energy-efficient fans that remove 90% more water vapor than standard models. Combined with strategic window placement, these systems prevent mildew before it starts.
Every layer matters – from waterproof underlayment to mold-resistant grout. Our techniques create spaces that stay dry through teenage shower marathons and toddler bath times alike. Because true comfort begins with spaces that breathe properly.
Lighting that Transforms Your Bathroom Experience
Lighting reshapes how we experience spaces daily. The right combination turns routine tasks into moments of ease while crafting atmospheres that soothe or energize. We design layers of illumination that adapt to your needs—whether applying mascara at dawn or unwinding after sunset.
Task Lighting for Daily Use
Precision matters where details count. Our approach focuses on three zones:
- Mirror flanking sconces at eye level (60-66″ from floor)
- Overhead fixtures with 4,000K color temperature for true tones
- Adjustable vanity bars for makeup application
A client recently shared: “I finally see my true skin tone while styling—no more guessing games!” Proper placement eliminates shadows that hide imperfections or distort colors.
Ambient and Accent Lighting Options
Soft glow meets smart tech in modern designs. Consider these pairings:
| Feature | Function | Wattage Guide |
|---|---|---|
| Dimmable recessed lights | Overall brightness control | 6-8W LED per can |
| Toe-kick lighting | Nighttime navigation | 3W/meter |
| Backlit mirrors | Drama without glare | 15-20W total |
We often layer 3000K and 2700K bulbs to balance crisp mornings with warm evenings. Smart systems let you save favorite settings—”Relax” mode dims lights to 40% while bath salts dissolve.
Incorporating Modern Technology and Eco-Friendly Solutions
Today’s homes deserve upgrades that simplify routines while respecting resources. We focus on innovations offering both convenience and conservation—solutions that adapt to your lifestyle while reducing environmental impact.
Smart Showers and Heating Systems
Programmable shower systems let everyone enjoy personalized settings. Set exact temperatures and flow rates for morning rushes or evening wind-downs. Some models even let you activate your preferred spray pattern via smartphone before stepping in.
Water-efficient products deliver savings without sacrifice. Low-flow toilets now use 1.28 gallons per flush versus older 3.5-gallon models—saving 20,000 gallons annually for families of four. Updated shower faucets with aerators maintain pressure while cutting water use by 30%.
| Feature | Traditional | Modern |
|---|---|---|
| Shower Duration | 8-10 gallons/min | 2-2.5 gallons/min |
| Heating Time | 45-60 seconds | Instant activation |
| Control Options | Manual knobs | Voice/app commands |
These advancements prove eco-conscious choices can enhance daily comfort. Whether adjusting your shower via smart speaker or tracking water savings through an app, modern tech makes sustainability effortless.
Maximizing Storage and Functional Design in Small Spaces
Smart storage solutions turn cramped areas into organized retreats. We focus on designs that hide clutter while keeping essentials within reach. The right mix of cabinets and open shelving creates visual balance without sacrificing practicality.
Vanity Options for Organized Spaces
Your vanity anchors the room’s storage potential. Wall-mounted units free up floor space, while double-sink models offer shared organization. Consider these popular configurations:
| Type | Storage Capacity | Best For |
|---|---|---|
| Floating Single-Sink | 2-3 drawers + cabinet | Narrow layouts |
| Double Basin with Towers | 6+ cabinets | Family use |
| Corner Unit | Rotating shelves | Awkward angles |
One client transformed their 5×7 area using vertical pull-out drawers. “We gained 40% more storage without expanding the footprint,” they shared. Soft-close hinges and dividers keep items tidy and accessible.
Innovative Built-In Shelving Ideas
Recessed niches between studs provide hidden storage for toiletries. We often install:
- Adjustable glass shelves in shower corners
- Floating ledges above toilets
- Mirrored cabinets with interior organizers
Don’t overlook toe-kick drawers or ceiling-height linen towers. These clever additions maximize every inch, proving small spaces can deliver big functionality when designed thoughtfully.
Step-by-Step DIY Demolition and Preparation
Tearing out old elements marks the exciting first step in refreshing your space. While demolition might seem straightforward, proper preparation prevents injuries and protects surrounding areas. We’ve learned through countless projects that skipping these steps often leads to costly repairs down the line.
Safety Precautions and Tool Essentials
Protect yourself before swinging that hammer. Sturdy gloves, safety goggles, and closed-toe shoes are non-negotiable. Make sure to shut off water and electrical lines to the area—we’ve seen too many weekend warriors get surprised by live wires behind walls.
Gather these essentials first:
Crowbars with cushioned grips, a reciprocating saw for tough spots, and heavy-duty trash bags. Keep a first-aid kit within arm’s reach, and always work with a partner when handling large fixtures.
Effective Workspace Preparation
Clear the stage for controlled chaos. Remove all towels, decor, and movable items from the room. Use thick plastic sheeting to seal doorways—this contains dust from invading your living spaces.
Lay protective drop cloths over floors you’re keeping intact. Pro tip: label salvageable materials like mirrors or light fixtures as you remove them. Things get chaotic fast, and this simple step saves hours of frustration later.
FAQ
How can I avoid overspending during a remodel?
Keep major plumbing lines in place to reduce labor costs, prioritize durable materials like porcelain tile, and work with licensed contractors. Setting a clear budget upfront helps track expenses and avoid surprises.
What’s the average timeline for a bathroom renovation?
Most projects take 3–6 weeks, depending on size and complexity. Delays often come from material shortages or permit approvals, so plan buffer time and order essentials like vanities or shower kits early.
How do I choose the right color scheme for a small bathroom?
Light, neutral tones like soft gray or off-white make compact spaces feel larger. Add personality with textured tiles or bold fixtures—think matte black faucets or patterned accent walls—to balance simplicity and style.
What waterproofing methods prevent mold and mildew?
Use cement board behind shower tiles, apply silicone sealant around joints, and install a high-quality exhaust fan. Products like Schluter KERDI membranes offer extra protection against moisture seepage.
Can I improve bathroom lighting without rewiring?
Yes! Layer LED vanity mirrors, dimmable overhead fixtures, and waterproof sconces. Brands like Philips Hue offer customizable smart bulbs that adjust color temperature for morning routines or evening relaxation.
Are heated floors worth the cost?
Radiant floor heating adds luxury and efficiency, especially in colder climates. Systems from Warmup or Nuheat are energy-saving and compatible with most flooring, including stone and ceramic tile.
How do I maximize storage in a tiny bathroom?
Opt for floating vanities with deep drawers, add recessed shelving in showers, or use over-the-toilet cabinets. Magnetic strips for grooming tools and tiered trays keep counters clutter-free.
What safety steps are crucial for DIY demolition?
Shut off water and power lines, wear gloves and goggles, and use a stud finder to avoid cutting into pipes. Rent a dumpster for debris and protect existing surfaces with heavy-duty drop cloths.
Should I replace my bathtub during a remodel?
If your tub is cracked or outdated, swapping it for a walk-in shower or soaking tub can modernize the space. For resale value, keep at least one full bathtub—especially in family-friendly homes.


