Table of Contents
ToggleThe Ultimate Guide to Home Repair: Tips and Tricks for Every DIYer
This article provides a comprehensive guide for DIYers looking to tackle home repair projects. Whether you’re a beginner or have some experience, this guide has got you covered. From basic maintenance tips to advanced techniques, you’ll find everything you need to know to successfully complete your own repairs and save money in the process.
Are you tired of calling a professional every time something breaks in your home? With this ultimate guide, you can become your own handyman and take control of your home repairs. No more waiting for someone else to fix the problem or spending a fortune on repair services. You’ll learn the skills and techniques needed to handle a wide range of home repair issues.
From fixing leaky faucets and clogged drains to repairing squeaky doors and patching drywall, this guide covers it all. Each section provides step-by-step instructions and helpful tips to ensure your repairs are done correctly and efficiently. You’ll gain the knowledge and confidence to tackle common home repair problems with ease.
But it doesn’t stop there. This guide also delves into more advanced home repair projects. Want to install laminate flooring or remodel your bathroom? No problem. With detailed instructions and expert advice, you’ll be able to take on these challenging projects and transform your space.
So, whether you’re a DIY enthusiast or just looking to save some money on home repairs, this ultimate guide is your go-to resource. Get ready to become a master of home repair and take pride in fixing things yourself. Let’s get started!
Essential Tools for Every DIYer
When it comes to tackling home repair projects, having the right tools is essential. Whether you’re a seasoned DIYer or just starting out, there are a few must-have tools that should be in every DIYer’s arsenal. These tools will not only make your repairs easier, but they will also save you time and money in the long run.
So, what are these essential tools? Let’s explore the basic tools needed for common home repair tasks:
- Hammer: A good quality hammer is a must-have for any DIYer. It’s versatile and can be used for a variety of tasks, from driving nails to removing old hardware.
- Screwdriver Set: Having a set of screwdrivers with different sizes and types of heads is essential. They will come in handy for tightening screws, assembling furniture, and many other tasks.
- Adjustable Wrench: An adjustable wrench is a versatile tool that can be used for tightening or loosening nuts and bolts of various sizes.
- Tape Measure: Accurate measurements are crucial for any home repair project. A tape measure will help you measure spaces, furniture dimensions, and much more.
- Utility Knife: A utility knife is a handy tool for cutting through materials such as drywall, carpet, and packaging.
- Level: A level is essential for ensuring that your shelves, pictures, and other items are straight and level.
- Pliers: Pliers are useful for gripping, cutting, and bending wires, as well as for holding small objects securely.
Now that you know the basic tools needed for home repairs, it’s important to choose high-quality tools that will last. While it can be tempting to opt for cheaper options, investing in good quality tools will save you money in the long run. High-quality tools are more durable, perform better, and are less likely to break or wear out quickly.
When choosing tools, consider factors such as the material they are made of, the brand reputation, and customer reviews. Look for tools that have a warranty or guarantee, as this indicates that the manufacturer stands behind their product.
Remember, having the right tools is the first step to successfully completing your home repair projects. So, stock up on these essential tools and get ready to tackle any DIY project that comes your way!
Common Home Repair Issues and How to Fix Them
Common home repair issues can be a source of frustration for homeowners. From leaky faucets to clogged drains and squeaky doors, these problems can disrupt daily life and even cause damage to your home if left untreated. But fear not, because with the right knowledge and tools, you can easily troubleshoot and fix these issues yourself.
Let’s start with leaky faucets. This is a common problem that can waste water and increase your utility bills. To fix a leaky faucet, you’ll need to identify the source of the leak, which is usually a worn-out washer or O-ring. Turn off the water supply to the faucet, disassemble the handle, and replace the faulty washer or O-ring. Then, reassemble the faucet and turn on the water supply to check for any remaining leaks.
Next, let’s tackle clogged drains. A clogged drain can be a major inconvenience, but it can usually be cleared with a few simple steps. Start by using a plunger to create suction and dislodge the clog. If that doesn’t work, try using a drain snake or a mixture of baking soda and vinegar to break up the clog. Remember to always flush the drain with hot water after clearing the clog to ensure it’s completely clear.
Squeaky doors can be annoying, but they can be easily fixed with a lubricant. Start by removing the hinge pins from the door and applying a lubricant, such as WD-40, to the pins and hinges. Then, replace the pins and open and close the door a few times to distribute the lubricant. This should eliminate the squeaking sound and make your door operate smoothly.
By following these step-by-step instructions and implementing these helpful tips, you can confidently tackle common home repair issues and save money on professional repairs. Remember to always prioritize safety and consult professional help if you’re unsure or uncomfortable with any repair task. With a little practice and the right tools, you’ll become a DIY expert in no time!
Electrical Repairs Made Easy
Don’t be intimidated by electrical repairs. This subsubheading walks you through the basics of electrical repair, including how to safely replace outlets, install light fixtures, and troubleshoot common electrical problems.
When it comes to electrical repairs, safety should always be your top priority. Before starting any electrical work, make sure to turn off the power to the circuit you’ll be working on. You can do this by flipping the corresponding circuit breaker in your electrical panel.
To safely replace outlets, start by turning off the power to the circuit. Once the power is off, remove the cover plate and unscrew the outlet from the electrical box. Disconnect the wires from the old outlet and connect them to the new outlet, following the color-coded markings (black for hot, white for neutral, and green or bare copper for ground).
Installing light fixtures is another common electrical repair task. Begin by turning off the power to the circuit and removing the old fixture. Connect the wires from the new fixture to the corresponding wires in the electrical box, again following the color-coded markings. Secure the fixture in place and replace the cover plate.
Troubleshooting common electrical problems can be a bit trickier, but with some basic knowledge, you can often identify and fix the issue yourself. Start by checking the circuit breaker to see if it has tripped. If it has, try resetting it. If the problem persists, you may need to replace the breaker or call a professional electrician for further assistance.
Remember, electrical repairs can be dangerous if not done correctly, so if you’re unsure or uncomfortable with any aspect of the repair, it’s always best to consult a professional. Safety should never be compromised when working with electricity.
Plumbing Repairs: From Drips to Burst Pipes
Gaining the knowledge and confidence to tackle plumbing repairs in your home is essential for any DIYer. This subsubsubheading will cover everything you need to know, from fixing minor leaks to dealing with more serious issues like burst pipes. By following these tips and techniques, you’ll acquire the skills necessary to handle any plumbing problem that may arise.
When it comes to fixing minor leaks, it’s important to identify the source of the leak first. This can often be done by inspecting the affected area for any visible signs of water damage or by using a leak detection device. Once you’ve located the source, you can proceed to repair it using plumbing tape or a pipe sealant.
If you’re faced with a more serious issue like a burst pipe, it’s crucial to act quickly to minimize water damage. Start by shutting off the main water supply to your home to prevent further flooding. Next, locate the burst pipe and use a pipe cutter or hacksaw to remove the damaged section. Replace it with a new section of pipe and secure it using pipe connectors and plumbing adhesive.
In addition to these common repairs, it’s also important to know how to maintain your plumbing system to prevent future issues. Regularly inspecting your pipes for signs of corrosion or damage, clearing clogged drains with a plunger or drain snake, and properly insulating your pipes to prevent freezing during colder months are all essential maintenance tasks.
By gaining the knowledge and skills to handle plumbing repairs, you’ll not only save money on hiring a professional but also have the satisfaction of knowing that you can take care of these issues yourself. Remember to always prioritize safety and consult a professional if you’re unsure about any aspect of the repair.
Fixing and Patching Drywall Like a Pro
Are you tired of staring at those unsightly holes and cracks in your walls? Don’t worry, with the right techniques and tricks, you can fix and patch drywall like a pro. This subsubsubheading will guide you through the process, from small holes to large cracks, ensuring that your walls look flawless when you’re done.
First, let’s start with small holes. These can be caused by nails, screws, or accidents. To fix them, you’ll need a few tools and materials. Here’s a list of what you’ll need:
- Putty knife
- Sanding block
- Joint compound
- Drywall tape
- Primer and paint
Once you have the necessary tools, follow these steps:
- Clean the hole and remove any loose debris.
- Cut a piece of drywall tape slightly larger than the hole.
- Apply a thin layer of joint compound over the hole.
- Place the drywall tape over the hole and press it firmly into the compound.
- Smooth out any excess compound and let it dry.
- Sand the area until it’s smooth and even.
- Apply a primer and paint to match the surrounding wall.
For larger cracks, you’ll need to follow a similar process but with a few additional steps. Here’s what you’ll need:
- Drywall saw
- Fiberglass mesh tape
- Corner bead
Follow these steps to fix larger cracks:
- Use a drywall saw to cut out the damaged area in a rectangular shape.
- Cut a piece of fiberglass mesh tape slightly larger than the hole.
- Apply a thin layer of joint compound over the hole.
- Place the fiberglass mesh tape over the hole and press it firmly into the compound.
- Apply a second layer of joint compound, making sure to feather the edges.
- Once the compound is dry, sand the area until it’s smooth and even.
- Apply a corner bead to the edges of the repaired area.
- Finish with a final layer of joint compound, feathering the edges again.
- Sand the area one last time and apply primer and paint to match the surrounding wall.
By following these techniques and tricks, you can confidently fix and patch drywall like a pro. Whether you’re dealing with small holes or large cracks, your walls will look flawless when you’re done. So, roll up your sleeves and get ready to transform your walls!
Painting Tips and Techniques
Are you ready to transform your home with a fresh coat of paint? With the right tips and techniques, you can achieve professional-looking results and create a space that reflects your personal style. Whether you’re a beginner or an experienced DIYer, this subsubheading has got you covered.
Choosing the Right Paint
When it comes to painting your home, selecting the right paint is crucial. Consider factors such as the type of surface you’re painting, the desired finish, and the color scheme you want to achieve. There are various types of paint available, including latex, oil-based, and specialty paints. Research different brands and read customer reviews to ensure you choose a high-quality paint that will provide long-lasting results.
Prepping Surfaces
Before you start painting, it’s important to properly prepare the surfaces. This includes cleaning the walls, sanding any rough areas, and filling in any holes or cracks with spackle. Use painter’s tape to protect trim and other areas that you don’t want to get paint on. Taking the time to properly prep the surfaces will ensure a smooth and professional-looking finish.
Applying Paint with Precision
When it comes to applying paint, technique is key. Use a high-quality brush or roller that is appropriate for the type of paint you’re using. Start by cutting in the edges with a brush, then use a roller to apply paint to the larger areas. Work in small sections, applying thin coats of paint and allowing each coat to dry before applying the next. This will help prevent drips and ensure an even finish.
By following these painting tips and techniques, you can achieve professional-looking results and transform your home with a fresh new look. Whether you’re painting a single room or tackling a larger project, taking the time to choose the right paint, properly prep the surfaces, and apply paint with precision will make all the difference. So grab your paintbrush and get ready to create a space that you’ll love.
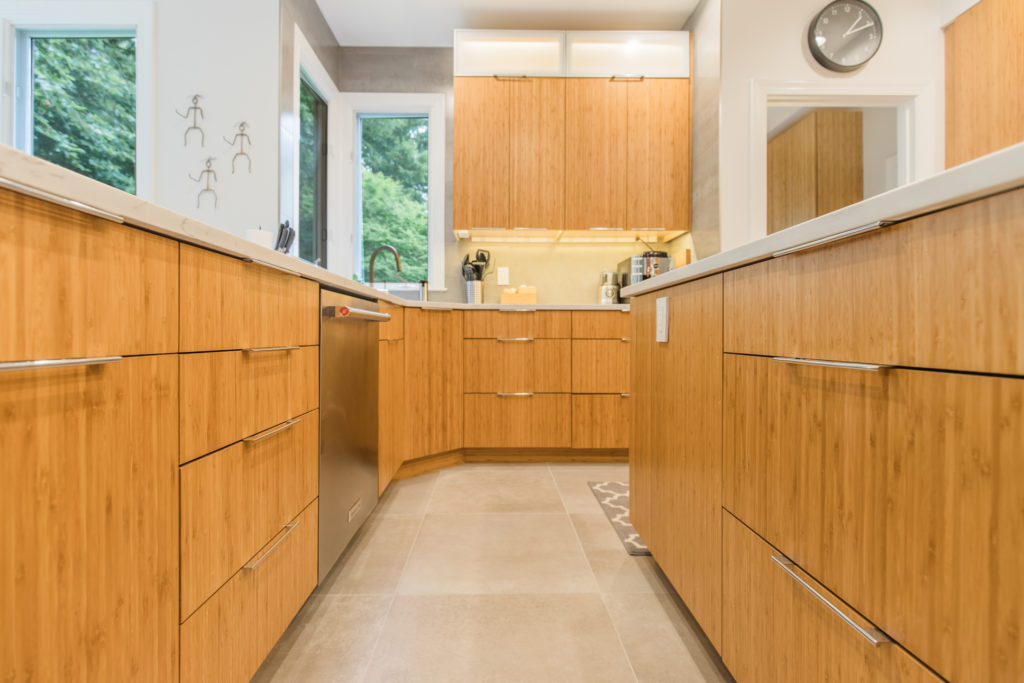
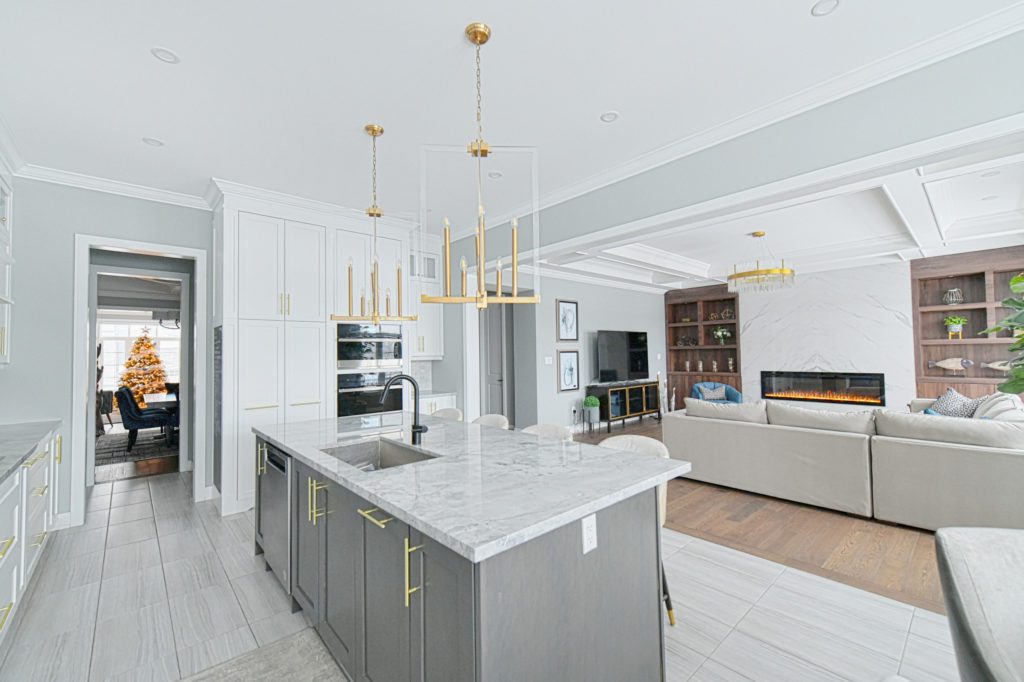
Advanced Home Repair Projects
Are you ready to take your DIY skills to the next level? This subheading is here to guide you through advanced home repair projects that will test your abilities and expand your knowledge. Whether you’re looking to install new flooring, remodel a bathroom, or build custom furniture, this section has got you covered.

Installing Flooring:
One of the most impactful ways to transform the look and feel of your home is by installing new flooring. Whether you prefer the elegance of hardwood, the durability of laminate, or the versatility of tile, this project requires careful planning and precise execution. From preparing the subfloor to cutting and installing the flooring material, our step-by-step guide will ensure you achieve professional-looking results.
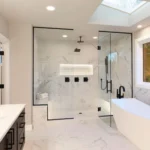
Remodeling a Bathroom:
If you’re tired of your outdated bathroom and want to create a space that is both functional and stylish, a bathroom remodel is the way to go. This project involves replacing fixtures, installing new tile, and creating a layout that maximizes space and efficiency. Our comprehensive DIY guide will walk you through each step, providing tips and techniques to help you achieve the bathroom of your dreams.
Building Custom Furniture:
Do you have a vision for a unique piece of furniture that perfectly fits your style and space? Building custom furniture allows you to bring your ideas to life and create one-of-a-kind pieces that can’t be found in stores. From choosing the right materials to mastering joinery techniques, our tips and techniques will give you the confidence to tackle this advanced project.
By exploring these advanced home repair projects, you’ll gain the knowledge and skills needed to tackle any project that comes your way. So roll up your sleeves, grab your tools, and get ready to take your DIY game to new heights!
Installing Laminate Flooring
Are you ready to give your space a fresh new look? Installing laminate flooring is a great way to transform your home with beautiful and durable flooring. With this step-by-step guide, you’ll learn how to install laminate flooring like a pro.
Step 1: Prepare the Subfloor
Before you can begin installing laminate flooring, it’s important to prepare the subfloor. Start by removing any existing flooring and ensuring the subfloor is clean and level. If needed, use a self-leveling compound to even out any uneven areas.
Step 2: Measure and Cut
Measure the dimensions of your room and calculate the amount of laminate flooring you’ll need. It’s always a good idea to purchase extra flooring to account for any mistakes or future repairs. Use a table saw or circular saw to cut the laminate planks to the desired length.
Step 3: Install Underlayment
Before laying the laminate flooring, install a layer of underlayment to provide cushioning and reduce noise. Unroll the underlayment and cut it to fit the dimensions of your room. Secure the underlayment to the subfloor using tape or adhesive.
Step 4: Start Laying the Flooring
Begin laying the laminate flooring from one corner of the room. Place spacers along the walls to allow for expansion. Lay the first row of planks, ensuring they are snugly fitted together. Use a tapping block and mallet to gently tap the planks into place.
Step 5: Continue Installation
Continue laying the laminate flooring row by row, interlocking the planks together. Use a pull bar and hammer to secure the planks tightly. Make sure to stagger the seams between rows to create a more natural look.
Step 6: Trim and Finish
Once you have installed all the laminate flooring, trim the excess underlayment and planks along the edges of the room. Install baseboards or quarter round molding to cover the expansion gap and give the flooring a finished look.
By following these steps, you can install laminate flooring with confidence and achieve professional-looking results. Transform your space with beautiful new flooring and enjoy the benefits of a durable and easy-to-maintain surface.
Remodeling Your Bathroom: A DIY Guide
Discover how to remodel your bathroom on a budget with this comprehensive DIY guide. Remodeling your bathroom can be a daunting task, but with the right knowledge and tools, you can transform your space into a functional and stylish oasis. This subsubheading covers topics such as replacing fixtures, installing tile, and creating a bathroom that meets your needs.
One of the first steps in remodeling your bathroom is replacing fixtures. Whether you’re upgrading your sink, toilet, or shower, this guide will walk you through the process step by step. You’ll learn how to remove the old fixtures, choose new ones that fit your style and budget, and install them correctly. With the right fixtures, you can instantly update the look and functionality of your bathroom.
The next topic covered in this DIY guide is installing tile. Tile is a popular choice for bathroom floors and walls due to its durability and water resistance. This guide will teach you how to properly prepare the surface, lay the tile, and grout it for a professional finish. Whether you’re a beginner or have some experience with tile installation, this guide will provide you with the tips and techniques you need to achieve a beautiful result.
Lastly, this DIY guide will help you create a functional and stylish space that meets your needs. It will provide you with ideas and inspiration for bathroom layouts, storage solutions, and decorative elements. You’ll learn how to maximize space, choose the right colors and materials, and create a bathroom that reflects your personal style.
By following this comprehensive DIY guide, you can remodel your bathroom on a budget and achieve professional-looking results. Whether you’re a first-time DIYer or have some experience with home improvement projects, this guide will provide you with the knowledge and confidence to tackle your bathroom remodel. Say goodbye to outdated fixtures and boring design, and hello to a bathroom that you’ll love spending time in.
Building Custom Furniture: Tips and Techniques
Unlock your inner carpenter with the “Building Custom Furniture: Tips and Techniques” subheading. This section of the article is dedicated to providing you with valuable tips and techniques for building your own custom furniture. Whether you’re a beginner or have some experience in woodworking, these tips will help you create unique pieces that perfectly fit your style and space.
The first step in building custom furniture is choosing the right materials. Consider the type of furniture you want to build and select materials that are durable and suitable for the project. Hardwoods such as oak, maple, and cherry are popular choices for furniture due to their strength and natural beauty. Softwoods like pine and cedar are also commonly used and offer a more affordable option.
Once you have your materials, it’s time to master joinery techniques. Joinery refers to the method used to connect different pieces of wood together. There are various types of joinery, including butt joints, dowel joints, and mortise and tenon joints. Each technique has its own advantages and is suitable for different furniture designs. By learning and practicing these techniques, you’ll be able to create sturdy and well-constructed furniture.
Another important aspect of building custom furniture is paying attention to the details. Take the time to measure and cut your pieces accurately, ensuring they fit together seamlessly. Sand and smooth the surfaces for a professional finish. Consider adding decorative elements such as carved details or unique hardware to make your furniture truly one-of-a-kind.
Remember, building custom furniture is a process that requires patience and attention to detail. Take your time, follow the tips and techniques provided, and enjoy the satisfaction of creating furniture that reflects your personal style and fits perfectly in your space.
Frequently Asked Questions
- What are the essential tools every DIYer should have?
As a DIYer, it’s important to have a basic set of tools to tackle home repair projects. Some essential tools include a hammer, screwdriver set, adjustable wrench, pliers, tape measure, level, and a utility knife. These tools will help you handle a wide range of repairs and maintenance tasks. - How can I fix a leaky faucet?
To fix a leaky faucet, start by turning off the water supply to the faucet. Then, disassemble the faucet and replace the worn-out washers or O-rings. Reassemble the faucet and turn the water supply back on. If the problem persists, you may need to replace the entire faucet. - What should I do if I have a clogged drain?
If you have a clogged drain, try using a plunger to remove the blockage. If that doesn’t work, you can use a drain snake or a chemical drain cleaner. Remember to follow the instructions carefully when using drain cleaners, as they can be harmful if not used properly. - How can I patch a hole in drywall?
To patch a hole in drywall, start by cleaning the area around the hole and removing any loose debris. Then, apply a patching compound or spackle to fill the hole, using a putty knife to smooth it out. Allow the compound to dry, then sand it down and apply a second coat if necessary. Finally, prime and paint the patched area to match the surrounding wall. - What are some tips for painting a room?
When painting a room, start by preparing the surfaces by cleaning and sanding them. Use painter’s tape to protect trim and other areas you don’t want to paint. Prime the walls if needed, then apply the paint using a roller or brush. Start from the top and work your way down, and allow each coat to dry before applying the next one. Don’t forget to cover furniture and floors to protect them from paint splatters.